The TV wall is usually the visual anchor of a living room. Get it right and the whole room feels intentional. Get it wrong and you end up with a screen that looks bolted on as an afterthought, surrounded by dangling cables and unresolved empty space on either side.
Knowing how to design a living room TV wall comes down to making the right decisions in the right order. Most people pick their TV first, then figure out the wall. That approach leads to mismatched proportions, wasted wall space, and a mounting height that strains the neck after an hour of watching. This guide walks through the full process, from measuring your wall and choosing a background treatment to managing cables and styling the shelves around your TV, so every decision builds on the last.
I’ve put together TV walls in apartments, large family rooms, and rental spaces across different budgets and styles. The principles that produce a finished, considered look are consistent across all of them.
Start with the Right TV Size and Wall Measurements

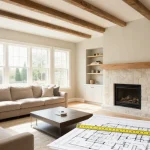
Before you pick a TV or a mounting solution, measure the wall. Write down the width available between furniture, doorways, and architectural features like a fireplace or built-in bookcase. That number is what you’re actually working with, not the full width of the wall.
For TV size, the general rule is that the screen should occupy roughly 40 to 60 percent of the wall width behind it. On a 10-foot wall (120 inches), a 65-inch screen sits comfortably without overwhelming the space. A 75-inch screen on that same wall pushes toward the upper limit but can work if the room is deep. Going beyond that makes the TV feel like it’s dominating the room rather than anchoring it.
Viewing distance also shapes the right size. Multiply your seating distance in inches from couch to wall by 0.55 to get the recommended screen diagonal. If your sofa sits 120 inches from the wall, a 65-inch screen is a natural fit. Most family rooms between 12 and 16 feet deep land between 65 and 75 inches, with 75 being the most common sweet spot for that range.
Once you have your screen size confirmed, you can plan everything around it. The TV size dictates the console or mount footprint, the scale of shelving on either side, and the proportions of any wall treatment you apply behind it. A 55-inch TV flanked by narrow floating shelves on a 12-foot wall looks undersized and tentative. The same wall planned around a 65-inch screen with wider shelving reads as resolved.
Skipping this step is one of the most common reasons TV walls look unbalanced once the furniture is in place. The planning takes 10 minutes and saves weeks of regret.
Choose Between Wall Mounting, a Media Console, and Built-Ins
How the TV is supported shapes everything about the finished look of the wall, so this decision comes early in the planning process.
Wall mounting gives you the cleanest result. The TV appears to float on the wall, the floor stays clear, and the wall treatment behind it becomes a real design element. Fixed mounts are the most compact option and hold the screen flush to the wall, which works best with flat accent walls or panels behind the TV. Tilting mounts let you adjust the viewing angle without pulling the TV away from the wall. Full-motion mounts extend and swivel, which is useful in corner placements or rooms where the TV is watched from multiple seating positions.
The main challenge with wall mounting is cable management. Once the TV is on the wall, every cable needs somewhere to go, and if you haven’t planned for that before drilling, you end up with wires hanging down in full view of the room. More on this in the cable management section below.
Media consoles are the most practical starting point, especially for renters or anyone who doesn’t want to commit to wall work. A solid console at the right height positions the TV well, holds devices inside closed or open compartments, and gives you surfaces to style. The trade-off is floor space and a visually heavier look at the base of the wall. For rental situations where drilling and in-wall cable work aren’t possible, a well-chosen console with a built-in cable tray is usually the most workable route. For more on designing a room without permanent wall fixes, the rental-friendly home office ideas guide covers similar no-drill principles.
Built-in shelving is the highest-impact option. Floor-to-ceiling built-ins surrounding the TV add storage, display space, and architectural weight to what is often just a flat painted wall. Custom joinery is expensive, but flat-pack alternatives and off-the-shelf modular units can produce a similar effect at significantly lower cost. The investment pays off in rooms where the TV wall is the primary focal point.
For open-plan living rooms where the TV wall is visible from a kitchen or dining area, built-ins or a strong wall treatment help define the living zone without a physical partition. The open floor plan decoration guide covers how the TV wall functions as a zone anchor in a shared space.
Pick a Background Wall Treatment
The wall behind your TV doesn’t have to be plain paint. A distinctive wall treatment is often what separates a TV wall that looks designed from one that looks like furniture was pushed against a bare surface.
Accent paint is the entry-level option and still works well. A deep, contrasting color behind the TV area, even if it’s just one wall or a painted rectangle the width of the built-in unit, draws the screen into the room and stops it from appearing to float against a white void. Dark navy, forest green, charcoal, and terracotta all hold up well across a range of TV sizes and console styles. The key is committing to the contrast. A color that’s only slightly darker than the rest of the room reads as a mistake rather than a decision.
Wallpaper adds texture and pattern without requiring structural work. Peel-and-stick options have improved enough to be a realistic choice for renters and for anyone who wants to change the look every few years. Large-scale botanical prints, geometric patterns, grasscloth textures, and linen-look papers all translate well to TV walls. Choose a pattern with enough visual complexity to be interesting but not so dense that it competes with the screen during viewing.
Wood slat panels are among the most popular current choices, and for good reason. Vertical or horizontal wood strips applied to the wall add warmth, depth, and a natural texture that reads well behind both floating TVs and media consoles. Ready-to-install slat panels are available pre-finished or paintable. The shadow lines created by the slats shift slightly with the light throughout the day, which gives the wall a quality that flat paint can’t replicate.
Shiplap and tongue-and-groove boards work similarly and have a different character. White shiplap leans coastal or Scandinavian. Painted shiplap in a dark color reads as more dramatic and contemporary. Either can be applied directly over existing drywall with construction adhesive and minimal fastening.
Stone and brick veneer suits rooms going for an industrial, rustic, or earthy aesthetic. Thin veneer panels don’t require structural support and adhere directly to drywall. They work especially well when the TV is mounted without a console, letting the raw texture of the wall carry the visual weight below the screen.
Large-format tile is a bolder choice but produces a genuinely refined result when done well. Porcelain panels in marble, slate, or concrete looks are increasingly common in contemporary living rooms. The surface area needed for a TV wall is relatively contained, so the material cost stays manageable even with premium tile.
Limewash paint and Venetian plaster both hold up well behind TVs used for extended sessions and add a depth to the wall surface that standard matte paint doesn’t achieve. Both are applied by hand, which means every wall is slightly different.
Plan Storage and Shelving Around the TV
A TV wall without a storage plan tends to accumulate clutter. Devices, remotes, gaming controllers, streaming sticks, and cables all need somewhere to live. If that isn’t built into the design from the start, they end up scattered across the console top or stacked beside the screen.
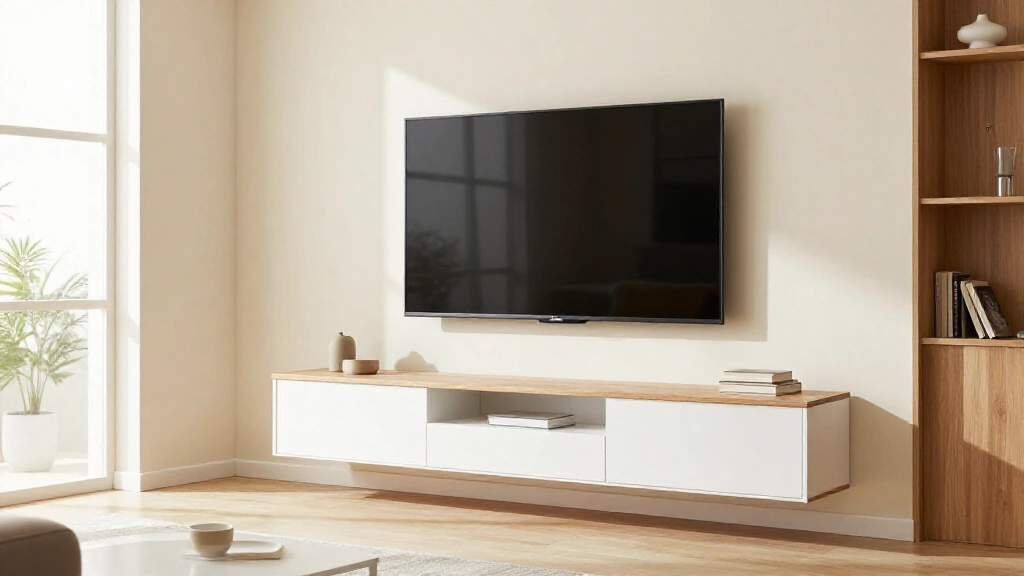
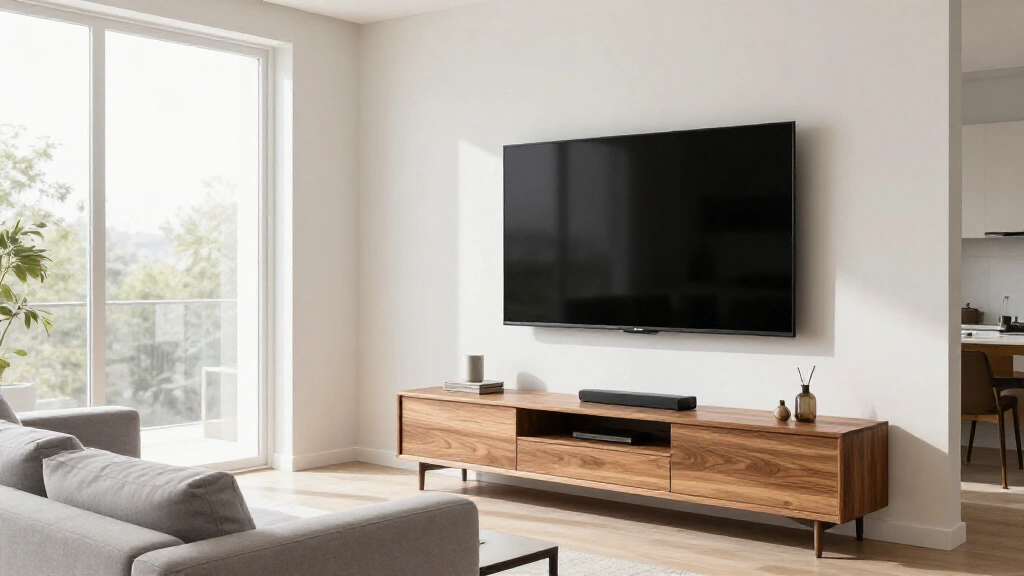
Media consoles should be sized relative to the TV above them. A console that’s significantly narrower than the screen looks top-heavy and unresolved. Aim for a console that matches the width of the TV or is slightly wider, ideally aligning with the outer edges of the mounting bracket. Standard console heights run between 18 and 24 inches, which places the TV center at a comfortable seated viewing height when combined with the screen’s dimensions.
The surface material of the console matters more than people expect, especially when the console is prominently positioned in the room. Wood veneer, solid hardwood, and stone-look surfaces all hold up well to daily use. If you want the visual weight of stone without the full cost, there are several durable options that perform just as well. The marble countertop alternatives guide covers the main options if you’re specifying a console top or built-in surface material.
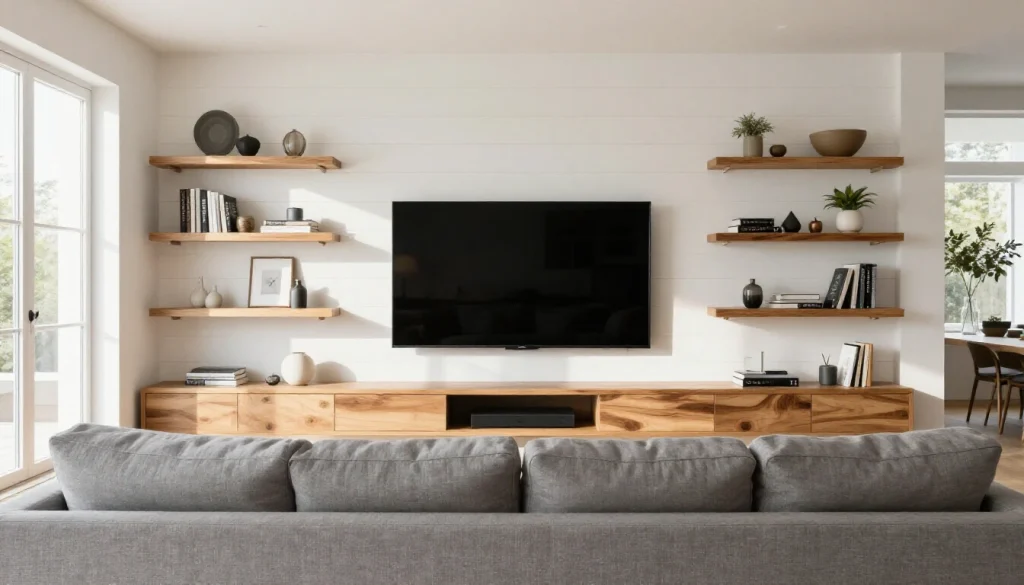
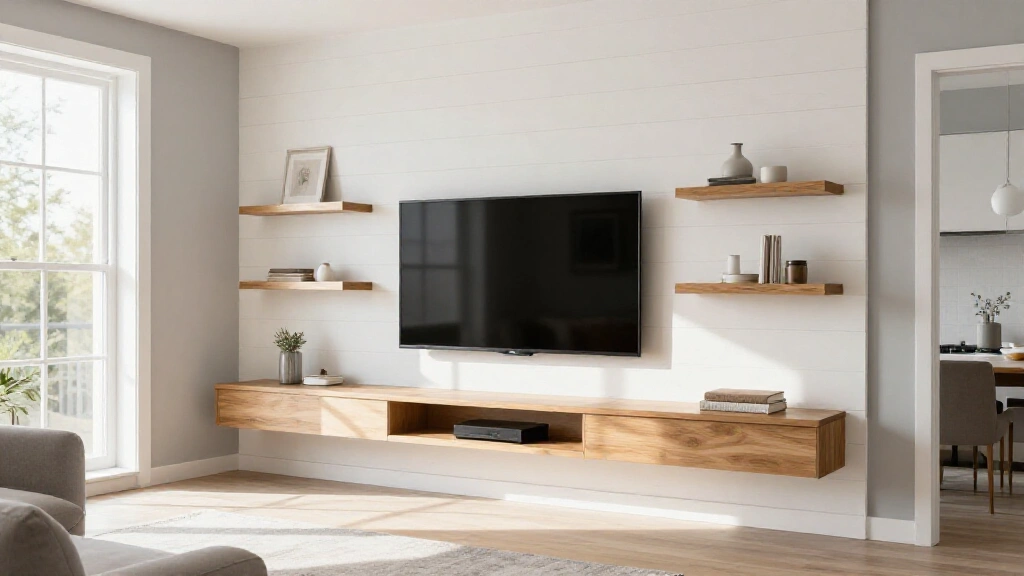
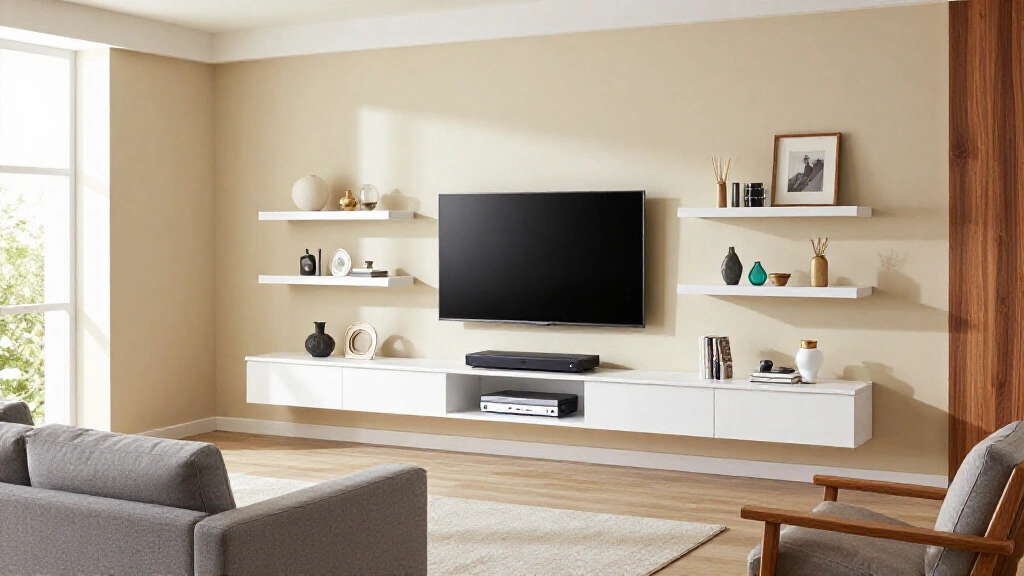
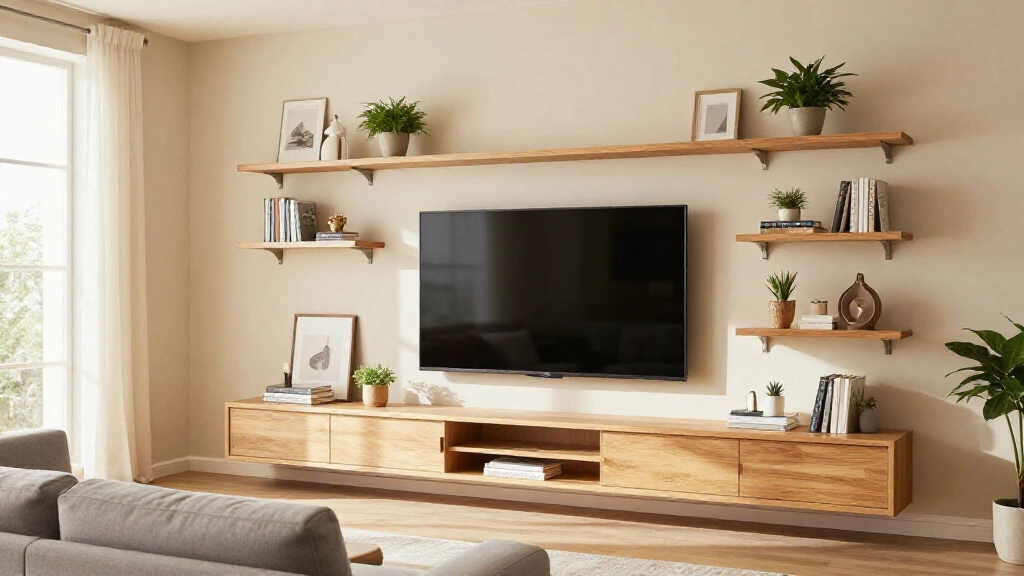
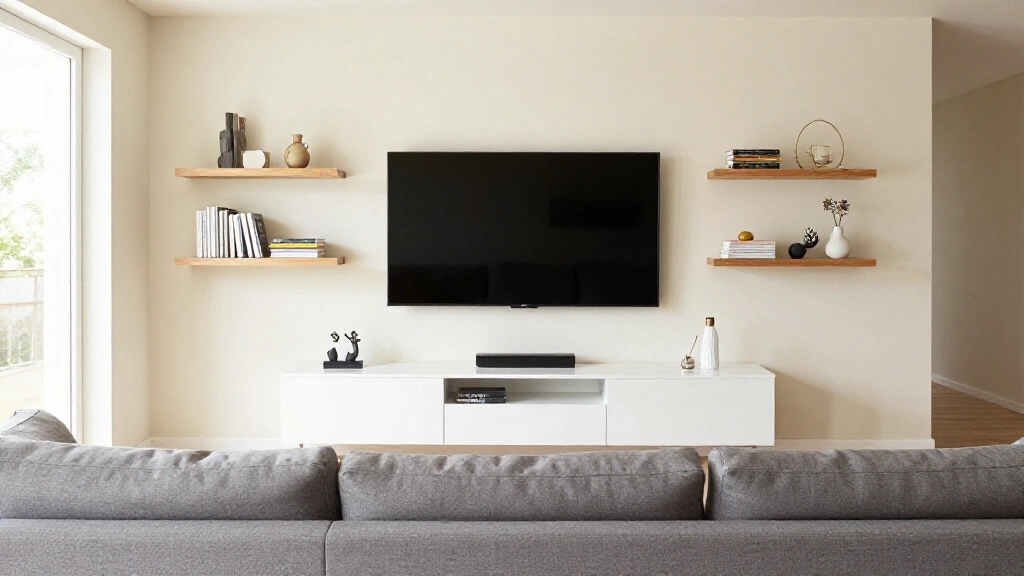
Floating shelves flanking or stacked above the TV provide display space without the visual bulk of a full shelving unit. Placement requires thought: shelves too close to the TV frame get visually absorbed into it, and shelves at inconsistent heights look improvised. A symmetrical arrangement on either side of the screen at two or three consistent heights works reliably. Asymmetrical arrangements can work too but require more deliberate styling to feel balanced.
Closed storage through cabinet doors, drawers, or baskets on lower shelves is worth including if you have significant equipment. Open shelving photographs better; closed storage is easier to maintain day-to-day. The most functional TV walls combine both, with closed storage at the lower level for devices and open shelves above for display.
For built-in arrangements, plan shelf depth around your actual equipment. Streaming players and soundbars are compact, but AV receivers, game consoles, and subwoofers need more depth and airflow clearance. Standard built-in shelf depth runs 12 to 15 inches, which accommodates most equipment comfortably without the shelves projecting too far into the room.
Handle Cable Management Before You Mount Anything

Cable management is the step most people skip and the step most people later regret. Once the TV is on the wall and the furniture is positioned, fixing exposed cables is far more disruptive than planning for them beforehand.
In-wall cable management kits are the cleanest solution for wall-mounted TVs. These kits include two wall plates and a pass-through power outlet that routes cables through the wall cavity between the TV and the outlet below. Most kits cost between $30 and $80 and can be installed without an electrician in areas where local code allows. The result is a TV that appears to have no cables at all. This is the approach worth prioritizing if you’re mounting to a standard drywall interior wall.
Surface cable raceways are the alternative for renters or for walls where running cables through the cavity isn’t possible, such as solid concrete or brick. Raceways are plastic channels that adhere to the wall surface and conceal cables in a painted channel. When painted to match the wall, they read as a minor architectural detail rather than improvised wire management. They’re not invisible, but they’re far better than loose cables.
Wireless HDMI systems allow source devices, a cable box, game console, and streaming player, to be placed in a cabinet or shelf and the signal transmitted wirelessly to the TV. These systems now support 4K at 60Hz reliably and can eliminate most of the cable problem entirely. The upfront cost is higher than a wired run, but in situations where in-wall cabling isn’t possible, the result is well worth it.
Soundbar placement affects cable management too. A soundbar mounted directly under the TV on the wall needs its own cable run to the console below. A soundbar sitting on the console top is simpler to manage but adds visual weight at the base of the screen. Wireless soundbar models that pair via Bluetooth or dedicated wireless connection remove that cable from the equation entirely.
One practical rule to follow: decide where every cable is going before you drill a single hole in the wall.
Light the TV Wall the Right Way

Lighting is the element that ties a TV wall together and the one most often ignored. In most living rooms, the overhead ceiling light does all the work during TV viewing. That creates glare on the screen and a high-contrast environment between the bright display and the dark surrounding wall, which causes eye fatigue over long viewing sessions.
Bias lighting is the most direct fix. LED strip lights mounted on the back of the TV along the top, bottom, and side edges create a soft glow on the wall behind the screen. This reduces the contrast between the bright display and the darker room behind it, making extended viewing noticeably more comfortable. Bias lighting kits start around $20 to $40. Higher-end versions sync to the on-screen content through HDMI or via a separate camera, matching the ambient glow to the dominant colors in whatever you’re watching. Even a static warm white strip behind the TV makes a visible difference in how the wall reads during evening use.
LED strips on shelves extend the same effect to the surrounding built-ins. Strips mounted under each shelf and pointed downward light the shelf below and create a layered glow across the full wall. This is especially effective in rooms where the TV wall is the primary visual element and the surrounding lighting is low.
Wall sconces mounted symmetrically on either side of the TV at roughly the center height of the screen add a more architectural quality. They work best in rooms with a traditional, transitional, or high-contrast contemporary look. Put sconces on a dimmer so the output can be lowered for viewing and raised when the TV is off.
Recessed downlights directly above the TV wall need careful positioning. A downlight aimed at the screen surface creates glare and washes out the image. Position recessed lighting slightly in front of the TV wall, angled to light the room rather than the screen. If there’s the opportunity to plan this at the renovation stage, a dedicated dimmer circuit for the TV wall lighting gives you the most control over the viewing environment throughout the day.
Natural light is also a factor. A window directly to the side of the TV wall or behind the seating position creates glare problems during daytime viewing. If you have flexibility in where the TV wall goes, position it on the wall opposite the main windows so the incoming light falls on the viewer rather than the screen.
Style the Area Around the TV
Once the TV is mounted, the shelves are in place, and the cables are handled, the styling phase is where the wall starts to feel personal. The most common mistake is over-filling the space or placing items at inconsistent heights without a visual logic to hold the arrangement together.
Flanking art panels on either side of a wall-mounted TV are one of the most reliable approaches to completing the wall composition. Two large vertical pieces of art positioned symmetrically beside the screen balance the horizontal mass of the TV and give the eye somewhere to go when the screen is off. The frames should match or closely relate to the hardware on the mount or console, keeping the metal tones consistent across the wall.
On floating shelves, layer objects with varied heights within each shelf rather than lining items up at the same level. A stack of two or three books, a mid-height object like a ceramic vessel or small sculpture, and one taller piece such as a plant or a larger decorative figure creates visual rhythm across the shelf. Three to four items per shelf with some empty space between them reads as intentional rather than cluttered. Matching every shelf to the same density flattens the arrangement.
Plants beside or near the TV wall bring organic texture that contrasts with the hard surfaces of a screen and frame. A trailing plant hanging from a higher shelf, a mid-size potted plant on the console surface, or a larger floor plant beside the shelving unit all work well. Place plants away from the TV vents and in positions that don’t block sight lines to the screen.
Below a floating TV without a console, consider a low bench, a long narrow tray with a few curated objects, or a single large potted plant. The space directly under a wall-mounted TV becomes a clutter magnet if left without any intention. Even a minimal object or two gives the eye somewhere to land and makes the wall feel complete.
Leave some space empty. Bare shelf space and clear wall area reads as confidence in the overall design. Every surface filled to capacity reads as unresolved, regardless of the quality of individual objects.
TV Wall Ideas for Small Living Rooms
Small living rooms create specific challenges for TV walls. The proportions are tighter, the margin for visual error is smaller, and the temptation to oversize the TV is stronger. A TV that’s even slightly too large or mounted a few inches too high reads as a problem immediately.
Go slightly smaller on the TV than you think you need. In rooms under 12 feet deep, a 55-inch screen is often the right choice. The common instinct is to go bigger for a more immersive experience, but a 65-inch screen in a compact room places the edges of the display in your peripheral vision during normal viewing, which is fatiguing rather than immersive. A screen sized correctly for the room always feels better to watch than one that fills it just because it technically fits.
Floor-to-ceiling built-ins can make small rooms feel larger. This sounds counterintuitive, but built-in shelving that runs the full height of the wall creates a sense of architectural order. The eye reads a complete built-in wall as a feature of the room rather than furniture crowded into a tight space, and that distinction makes the room feel more finished and, as a result, more spacious.
Remove the console entirely. In a small living room, a wall-mounted TV with nothing at its base opens up the floor plane significantly. The space a media console would occupy becomes visual breathing room. A single narrow floating shelf below the TV provides a surface for one or two devices without the bulk. Keeping the lower third of the wall clear is one of the most effective ways to make a small room feel less confined.
Use the wall treatment to create depth. A darker color or textured panel behind the TV area draws the screen forward visually and makes the surrounding wall recede, giving the impression of depth that a flat uniformly painted wall doesn’t provide.
In living rooms that share space with a dining area or kitchen, the TV wall often needs to read well from multiple angles and distances. The open floor plan decoration guide covers how to position and style the TV wall within a larger shared space so it functions as both a focal point and a zone anchor.
How to Handle a TV and Fireplace on the Same Wall
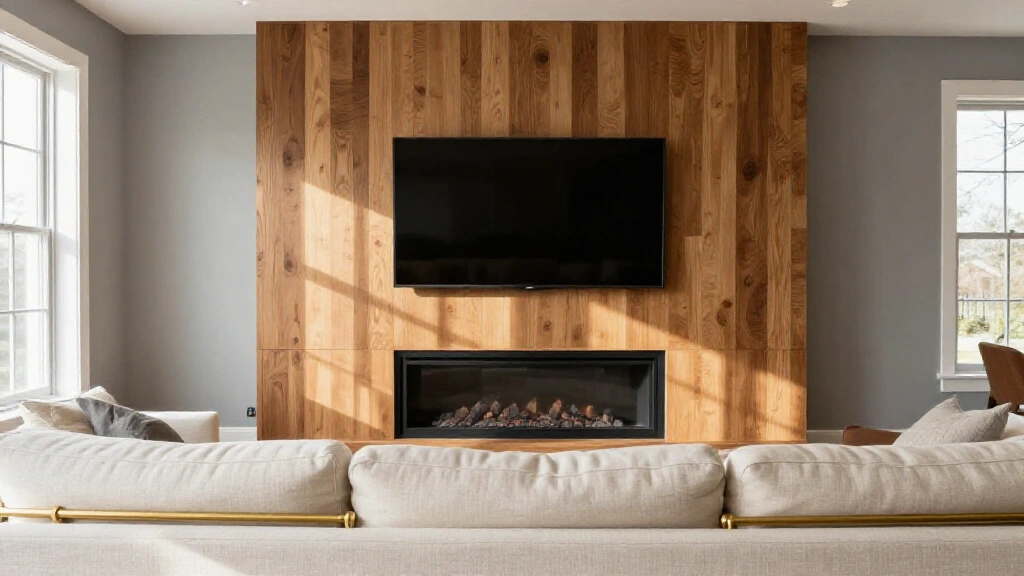
The TV-above-fireplace placement is extremely common and also one of the most debated decisions in living room design. Done without consideration, it creates real comfort and technical problems. Approached with intention, it can work.
The primary case against mounting above the fireplace is viewing angle. A TV mounted above a standard mantel sits with its bottom edge at roughly 54 to 60 inches from the floor, placing the screen center at 65 to 75 inches. That’s significantly higher than the recommended 42 to 48 inches for seated eye level. Watching for extended periods means tilting your head upward, which creates neck strain over time. Heat and smoke from a wood-burning or gas firebox also pose a long-term risk to the electronics if there isn’t a deep enough mantel shelf to deflect heat away from the wall above.
If you’re committed to the above-fireplace position, a full-motion tilting mount lets you angle the screen downward toward the seating area, reducing some of the neck-strain problem. Maintain at least 8 to 12 inches between the top of the firebox opening and the bottom of the TV. Avoid running the fireplace and the TV simultaneously for long periods if the heat output is significant.
Side-by-side placement is a better option for most rooms. Positioning the TV and the fireplace on the same wall but adjacent rather than stacked requires at least 12 to 14 feet of wall width, but it allows each element to sit at its optimal height. The fireplace becomes a visual feature at its natural scale, and the TV can be mounted at the correct seated eye level without compromise.
Separate walls for each is a workable solution in L-shaped rooms or open-plan spaces where the seating can be angled to face both elements. This approach gives you two distinct focal points, which is often used in larger living rooms to support different seating configurations within the same space.
Common TV Wall Design Mistakes to Avoid
Even a well-planned TV wall can go wrong at the execution stage. These are the errors that appear most often.
Mounting the TV too high is the single most frequent mistake. The center of the screen should sit at seated eye level, approximately 42 to 48 inches from the floor for standard sofa seating. Most people mount significantly above this because it looks proportionate when standing in front of the wall. Check the height from a seated position before committing to any holes in the wall.
Skipping a wall treatment plan and mounting the TV on plain paint is a missed opportunity. The wall behind the TV is seen during every single viewing session, and even a simple change like a painted accent color or a wood panel section dramatically improves the finished result. The TV wall is not the place for the default white wall.
Ignoring lighting conditions when planning the TV wall location leads to glare problems that can’t easily be fixed later. A window directly beside or behind the seating area creates screen reflections during daylight hours that make the room nearly unwatchable without closing the blinds. Where possible, position the TV wall opposite the main source of natural light so incoming daylight falls on the viewers, not the screen.
Over-styling the shelves with too many small objects creates visual noise that competes with the screen. The TV wall should feel complete during viewing without demanding attention from the items placed around it. A few objects styled with intention and negative space between them is more effective than a dense, varied collection.
Choosing a wall treatment at the wrong scale is a subtler but real issue. A fine-texture pattern or small tile repeat that looks good in a sample or a showroom can disappear or read as muddy behind a large TV in a real room. Test your wall treatment against a sample at the actual wall or view it at comparable scale before committing. What works in a 4×4 inch swatch does not always translate to a 10-foot wall.
What a Finished TV Wall Actually Requires
Designing a living room TV wall is a layered process, but each layer follows a clear sequence. Get the size confirmed before mounting anything. Choose the mounting approach before planning the wall treatment. Plan the cables before the TV goes up. Address the lighting before you style the shelves. Follow that order and the decisions at each stage become straightforward.
The goal is a space where the TV belongs there rather than a screen placed wherever the power outlet happened to be. A well-designed TV wall makes the screen an architectural element of the room. With the right sequence of decisions, you get a living room where the TV is part of the design and the wall holds up visually with the screen both on and off.